Using UV art with black light in style – without an “effect show”
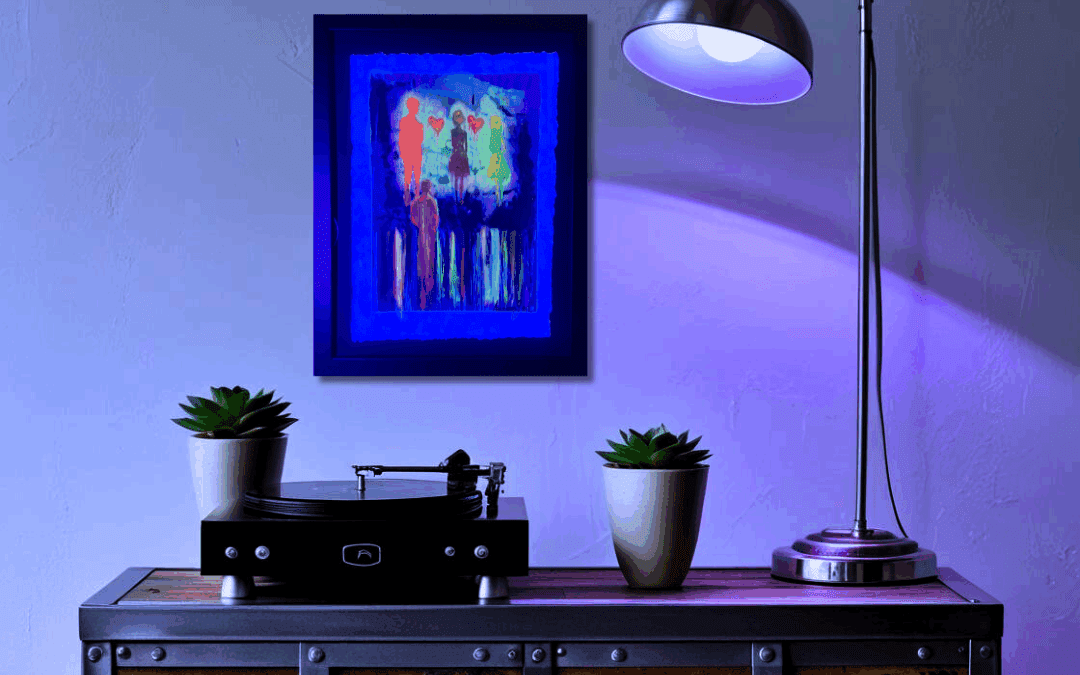
UV can create something very special in a room: A work stands completely on its own in daylight – and opens up a second level if required. Not as a trick, but as a decision in the picture. This is exactly how I work with AuroraGen: layer by layer, with a moment that only reveals itself in different light.
In short
Daylight: The work appears normal and complete.
UV/black light: Hidden details emerge and change the effect – calm, clear, precise.
What does “UV level” mean at AuroraGen?
UV ink reacts to black light and begins to glow. In normal light, this layer often remains subdued or is only noticeable as a subtle accent. Under UV, an additional layer is created: signs, traces, small shifts. Things that you don’t see immediately – but don’t forget once you have discovered them.
The beauty of it: you determine the moment. UV doesn’t have to be “on”. It can be a conscious ritual – a second glance when the day gets quieter.
Lamps: simple solutions with a high-quality appearance
You don’t need a special setup. The decisive factor is not so much “maximum power”, but targeted light and clean placement.
1) E27 UV bulb (for normal floor or table lamps)
Ideal if you want to use an existing lamp.
Advantage: simple, quick, easy to integrate.
Tip: intended more as a “momentary light” (switch on/off when you want it).
2) Small gooseneck lamps with USB (Powerbank compatible)
Super flexible because you can position them almost anywhere.
Advantage: you can test the angle and distance perfectly – without installation.
Tip: perfect if you first want to find out which spot works best.
3) UV LED spots (swiveling)
If you want it clean and targeted.
Advantage: controlled, pinpoint accuracy, quickly creates a “gallery” effect.
Tip: one spot is often enough – two spots have a calmer and more even effect.
4) UV LED bars / light bars
Good if you want an even surface or want to hide the light inconspicuously (e.g. on the edge of a cupboard/shelf).
Advantage: even, often very elegant to hide.
Tip: not too close to the picture – a little distance is better for a calm result.
As a general rule, it is better to use a specific spot/bar than to flood the whole room. This keeps it high quality and not “party”.
Placement in 5 steps (makes the biggest difference)
-
Slightly lateral instead of frontal
Lateral UV creates depth and makes details easier to read. -
Start at a distance
Starting too close quickly feels hard. Start further away and feel your way. -
Test height
Slightly above the picture or at eye level to the side often works best. -
Avoid glare
If you look directly into the light source, it is usually too dominant. Goal: You see the work, not the lamp. -
Test in a real room situation
Test with your usual evening light, not just in a completely dark room.
Three set-ups that almost always look good
Minimal: UV as “secret mode”
An E27 solution or a single spotlight that is only on when needed.
Perfect if you want to use UV as a special moment.
Clean: two small spots
Two swivel spots, slightly offset.
Quick, high-quality and uniform effect.
Invisible: Bar/USB light in the furniture
An LED bar or USB gooseneck lamp hidden in the shelf/sideboard.
Ideal if you don’t want technology to stand out in the room.
Care & durability
-
No aggressive cleaning agents
-
No blazing sun for hours
-
Dust gently (dry, soft)
FAQ
Does the movement also work without UV?
Yes, daylight is the basis. UV is an additional level.
Does UV always appear bright?
Not if it is used in a targeted manner. High quality is achieved through control: position, distance, not too much surface area.
What is the easiest solution to start?
USB gooseneck + power bank (for testing) or an E27 UV bulb in an existing lamp.